|
Many people who upcycle using paint do large furniture items, however there are a lot of smaller items around your home you can transform too. Some of my favourite projects are small pieces I've either already had or that I have picked up at a charity store for very little cost. 1. Candleholders These two glass candleholders cost me .50 cents each at a secondhand store. With layers of paint, and texture (created using my brush), and a little gilding wax they came up beautifully. 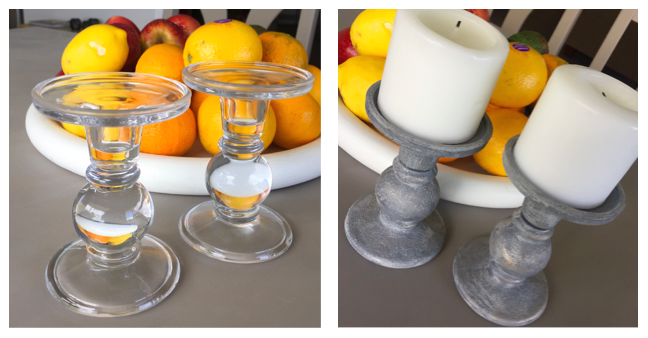 2. Mirror This large mirror was one we had at home that needed modernising. With one generous coat of Mocha paint and white wax applied straight over the top, this really looks beautiful in our hallway now. 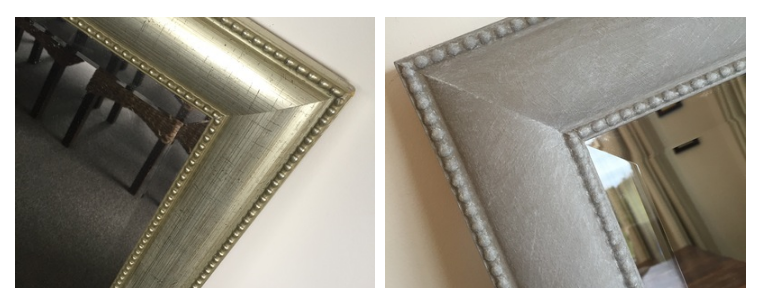 3. Table A cute little pine table from an opportunity store for just $10, this project was fun. With layers, texture, and a secret ingredient, this rustic technique is one I teach in my Rustic Paint Workshop(online or in our studio).  4. Wooden Knife Block Again a charity store find, this little block was just $2 and took about 10 minutes to transform using the smooth distressed finish taught in Painting Workshops (online or in our studio). 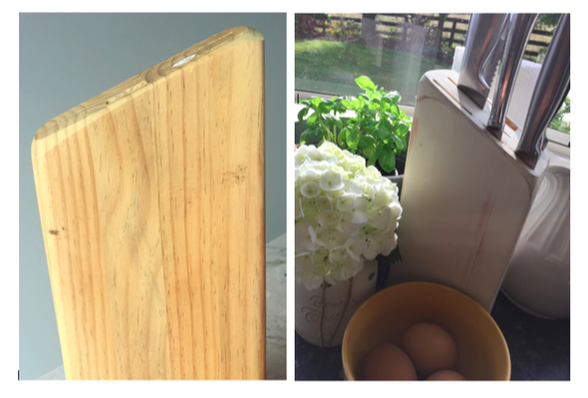 5. Rustic Tray A very untidy and very old serving tray could have been given up for the trash, but with the rustic painting technique applied, it's as good as new, and completely on trend. 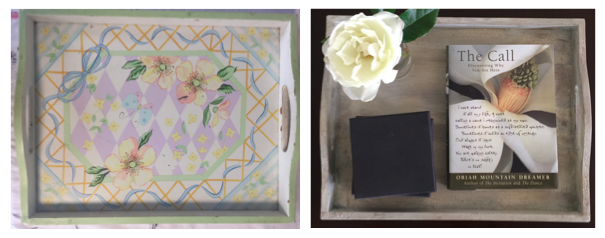 Now that you've got some ideas, what will you paint? Remember to check out our FREE Painting Workshop to learn even more upcycling skills. If you'd love to see more, check out my Facebook page, Upcycled & Co. and come on over and join my Facebook group, the Upcycled Community. See you there! Kathryn x
0 Comments
I do have to admit that I'm a starter. In my studio there's nothing I LOVE more than starting a new project - the anticipation and initial excitement is what I love the most. Smaller projects are really what I enjoy the most. So... needless to say, our dining room suite has been a bit of a challenge. Now for those of you who follow me closely, you will know that this has been dragging on way too long. I think I started it around 4 or 5 months ago (she says with embarrassment), but I am getting there. It's almost done now with just the final chair seats to be covered. With this project I decided to polyurethane the chairs and the table top, to provide extra protection. Here's what I did: 1. Painted using a textured painting technique. 2. Finished the chairs with a dry brushing effect using White. 3. Applied white wax to the table legs and base. 4. Polyurethaned the table top and chairs for added protection. If you'd love to see more projects, head on over and join our Facebook Group, the Upcycled Community. We now have over 800 members who are sharing their projects all the time. Happy upcycling! Kathryn x |
Author
Hi I'm Kathryn,
You're going to love how QUICK, EASY + AFFORDABLE it is to transform your furniture. With Upcycled & Co. Furniture Paint, a 3-in-1 that primes, paints and seals (it's not chalk paint) you won't need to sand, prime, wax or seal - just paint and you're done. I'm super-passionate about sharing what I know about furniture painting to make it easy for you. If you'd love to start a creative business I can help with that too, simply click here. Enjoy! 
|