 We becoming increasingly aware of the importance of sustainability, and upcycling is emerging as a shining star. This creative and environmentally-friendly practice is all about transforming discarded items into new, valuable pieces. But upcycling offers far more than just a way to reduce waste; it comes with a multitude of benefits. In this article, we'll explore the myriad advantages of upcycling. 1. Environmental Impact Upcycling is a powerful weapon against the growing problem of waste. By repurposing items that would otherwise end up in landfills or incinerators, we reduce the strain on our planet's resources and cut down on harmful emissions. Each upcycled project is a small victory in the fight against climate change and environmental degradation. 2. Creativity Unleashed Upcycling is the playground of the imagination. It encourages creativity by challenging individuals to see potential in items others might overlook. Whether it's turning an old ladder into a bookshelf or transforming pallets into a stylish coffee table, upcycling allows people to express their unique style and creativity. 3. Cost-Effective One person's trash can be another person's treasure, and upcycling is a budget-friendly way to furnish your home or wardrobe. Instead of splurging on new items, you can often find second-hand or discarded materials for a fraction of the cost and then customize them to suit your preferences. 4. Unique and Personalized Upcycled pieces add character and uniqueness to your living space. Since each upcycled item is a product of your creativity and ingenuity, it tells a story and becomes a conversation starter. Your home becomes a gallery of your personal style and a reflection of your commitment to sustainable living. 5. Reduces the Need for New Resources The production of new goods often requires substantial amounts of raw materials, energy, and water. By upcycling, you decrease the demand for these resources and help preserve natural habitats, reduce pollution, and minimize the environmental footprint associated with manufacturing. 6. Builds Skills Upcycling is an opportunity to learn new skills. Whether it's woodworking, sewing, painting, or other crafts, engaging in upcycling projects can expand your knowledge and abilities. This hands-on experience can be personally fulfilling and even lead to new hobbies or career opportunities. 7. Supports Local Economy Frequenting thrift stores, flea markets, and second-hand shops not only saves you money but also supports local businesses and charities. Many of these establishments rely on the sale of second-hand goods to fund their operations and support community initiatives. 8. Encourages Sustainable Thinking Practicing upcycling fosters a sustainable mindset. It prompts individuals to think critically about their consumption habits and consider the long-term impact of their choices. This shift in perspective can extend to other aspects of life, leading to more sustainable choices overall. Upcycling isn't just a creative outlet or a way to reduce waste; it's a lifestyle that benefits individuals, communities, and the planet. By upcycling, we tap into our creative potential, reduce our ecological footprint, save money, and promote a more sustainable and mindful way of living. So, grab that discarded item, envision its potential, and embark on your upcycling journey—you'll be contributing to a brighter and more sustainable future.
0 Comments
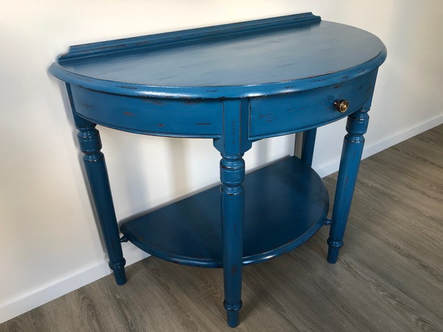
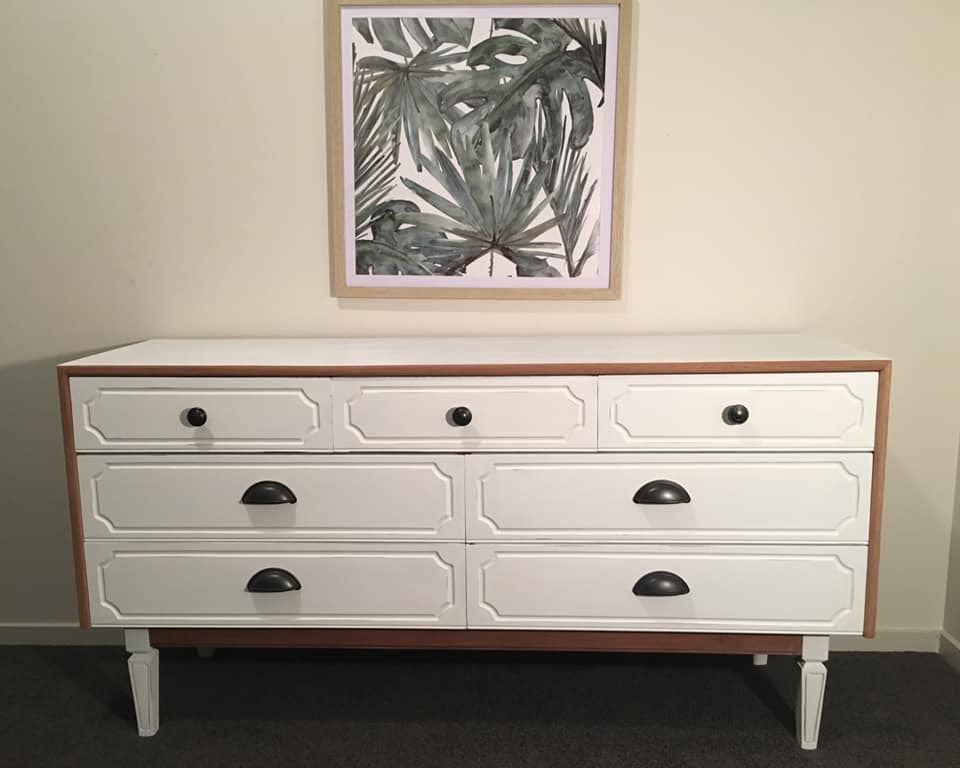
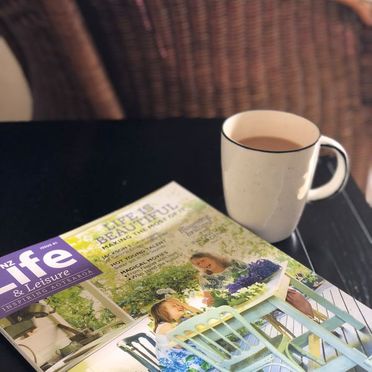
 Upcycling really is easy and great fun. But, being aware of these five pitfalls will make your project run smoothly from start to finish.
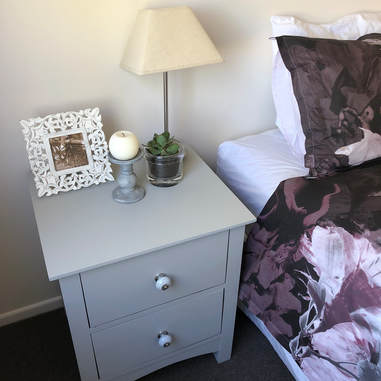
Many of the people I teach (in-person and online) in my Furniture Paint 101 workshops discover how easy it is when they practised during the class. What I hear most is the people have procrastinated for so long due to fear, and then, like me, they discover that it's way easier than they thought. Today I wanted to share five tips related to common fears people have to help you get started. 1. Reducing overwhelm It can be really inspiring to see images on line when a kitchen, bathroom, or outdoor furniture set has been transformed in Upcycled & Co. Furniture Paint. But often, the thought of doing your own projects brings up fear that sees you putting it off again and again and again. The best thing to do is buy some test pots of paint and get started on something small; a mirror, single chair, or some old photo frames are great first time projects. You'll get used to how the paint goes on, giving you the confidence to tackle bigger pieces. 2. Dealing with bleed through Some timbers will leach tannins that bleed through the paint when it's applied. Often it happens with oak or teak pieces, but don't be alarmed if you find yourself in this predicament, there is a fix. A product called Shellac, readily available from your hardware store works like magic. Simply apply two coats over the parts where the furniture has bled, let it dry, then carry on painting. 3. Doubt about longevity of painted furniture Regularly I have followers comment asking how robust the pieces I show actually are. I can assure you they are extremely hardy. In our home, we have pieces (inside and outside) that were painted when I launched the brand in 2017. One small table has sat outside that entire time and is perfect. 4. Getting a smooth finish Our paint is self-levelling and therefore creates a beautiful smooth finish. The important thing to remember here is to get the paint on, then leave it. Because this is an acrylic paint, it dries very quickly and the more you drag your brush back and forth over the surface, the more issues you will have. Doing this will create an uneven finish, but this can be fixed. Simply sand the surface with 240grit sandpaper and apply one more coat watered down by about 10%. 5. Paint adhering to different surfaces You really can paint anything; from glass to plastic, wood, metal and everything in between. And, as I said earlier, interior and exterior projects. Our paint adheres well to all surfaces, providing you follow our instructions carefully. In particular, when painting surfaces that have built-up dirt, wax or grime, and those that are shiny. You will have success as long as you follow each step. I'd love to hear about your upcycling projects and see before and after projects. You can email those to me at kathryn@upcycledandco.com. 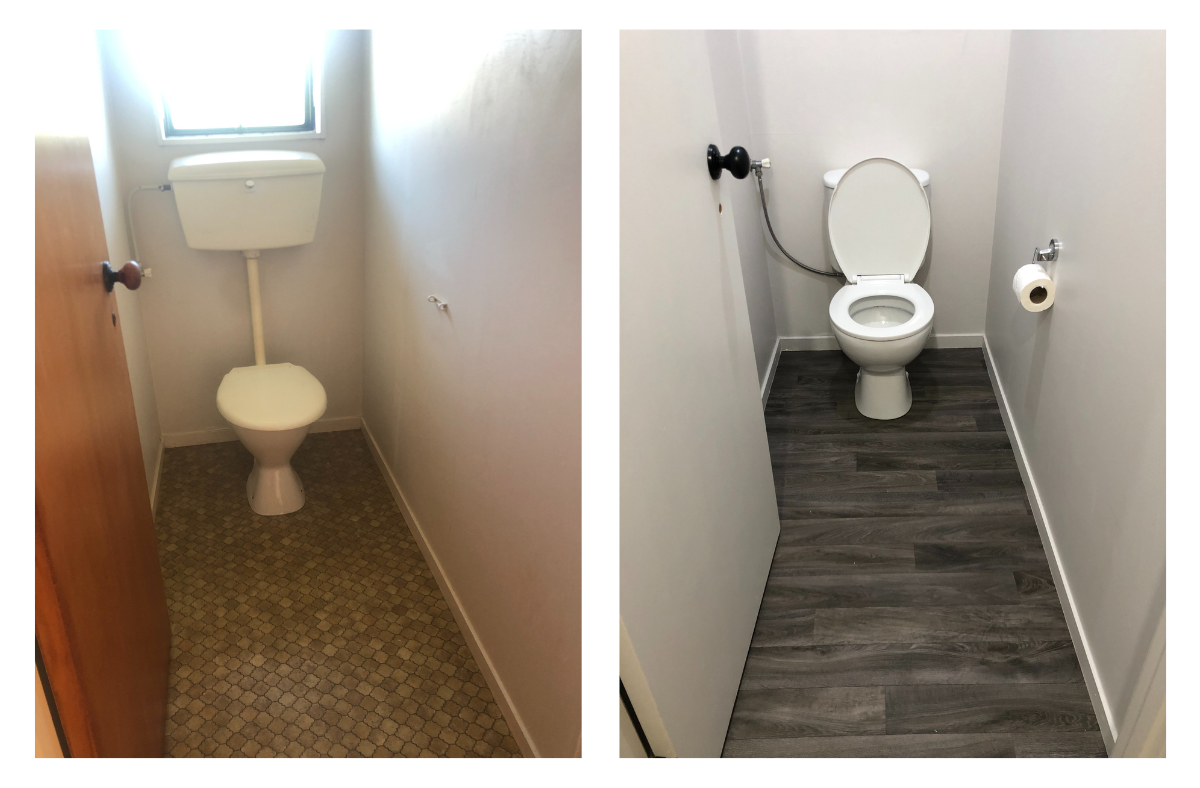 You may have seen our Pukekohe rental property renovation on my social media these past few weeks.
It's been a fun project! From choosing the colours, to getting out from behind by desk again, I've loved every minute of it. I think it's around 15 years since we've undertaken a project like this and I'd forgotten how rewarding it is. Here's how you can achieve this look: 1. Lightly sand walls and woodwork and fill any imperfections. 2. Clean thoroughly to remove all dust. 3. Apply Upcycled & Co. Furniture Paint to all surfaces (skirtings, walls, doors and handles). 4. Change toilet. 5. Lay vinyl flooring (my clever husband does this for us). If you've got any questions, please get in touch here via Facebook or email info@upcycledandco.com 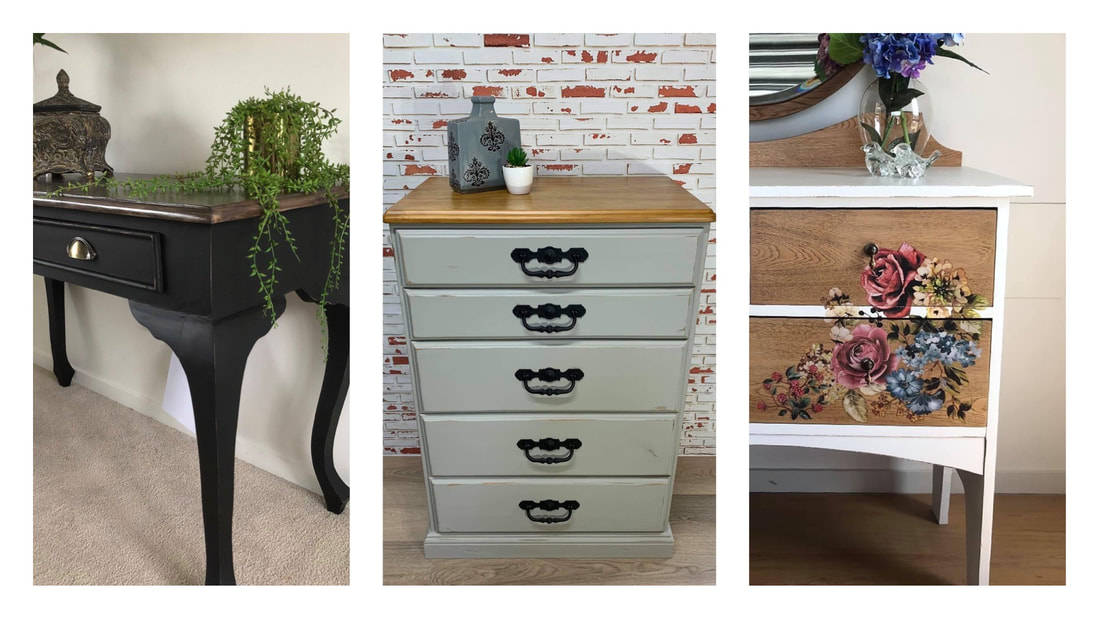 My students and customers often ask me, What colour do you think I should paint my bookshelf/coffee table/dining suite? Without seeing their decor, it's difficult to give advice, however there are some questions I ask to help them decide.
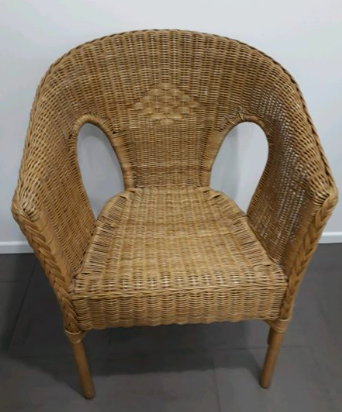
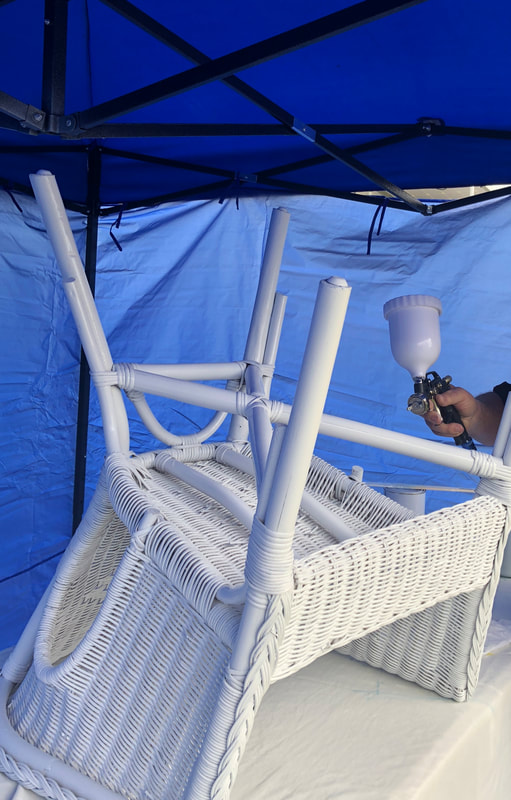
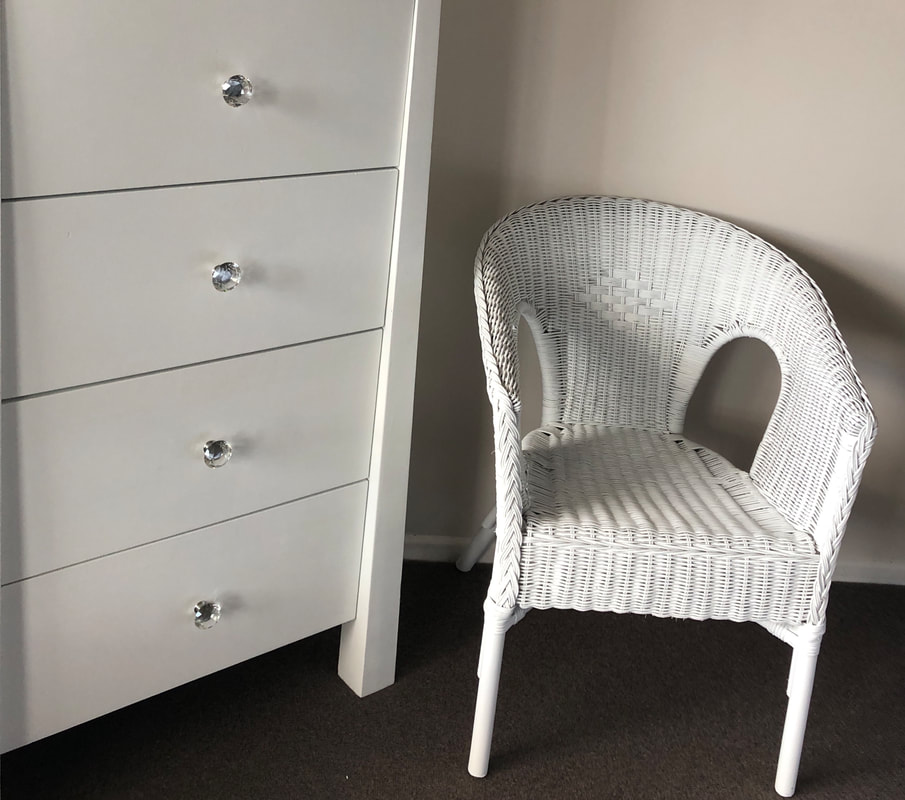
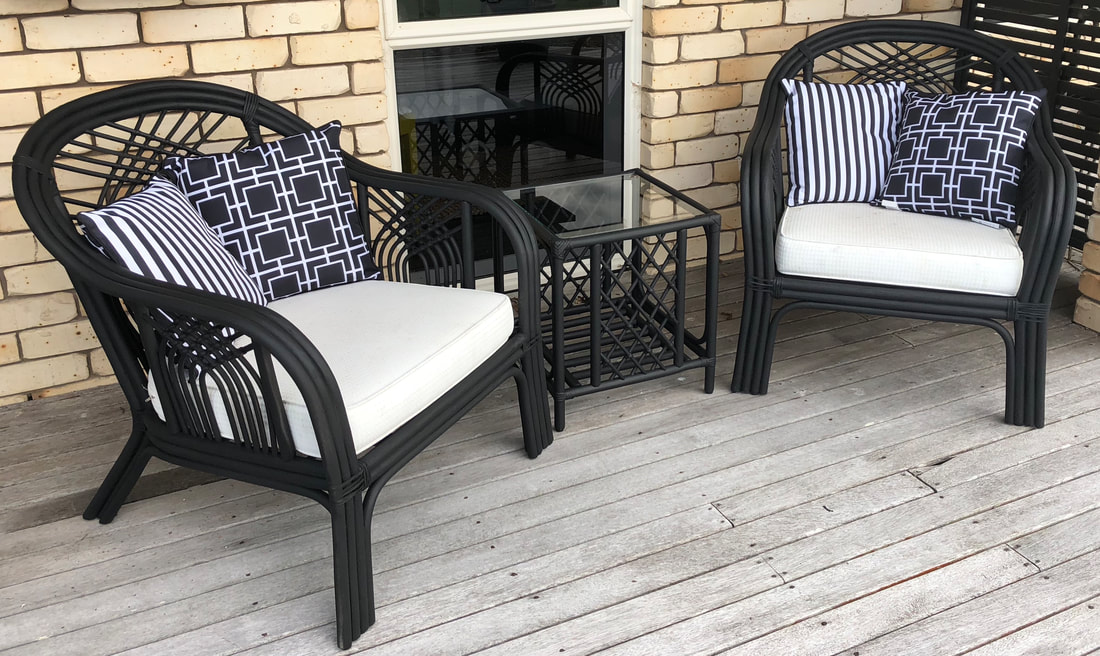
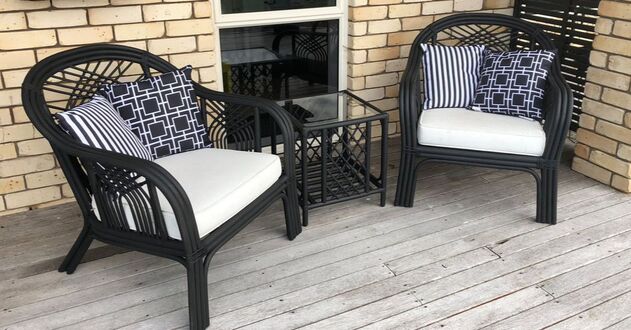 This week I've had great fun giving our cane furniture a makeover for Summer. A quick and easy project with two coats of Upcycled & Co. Furniture Paint in Jet, followed by 7 days to fully cure (just back outside on the deck where they were), and they're done.
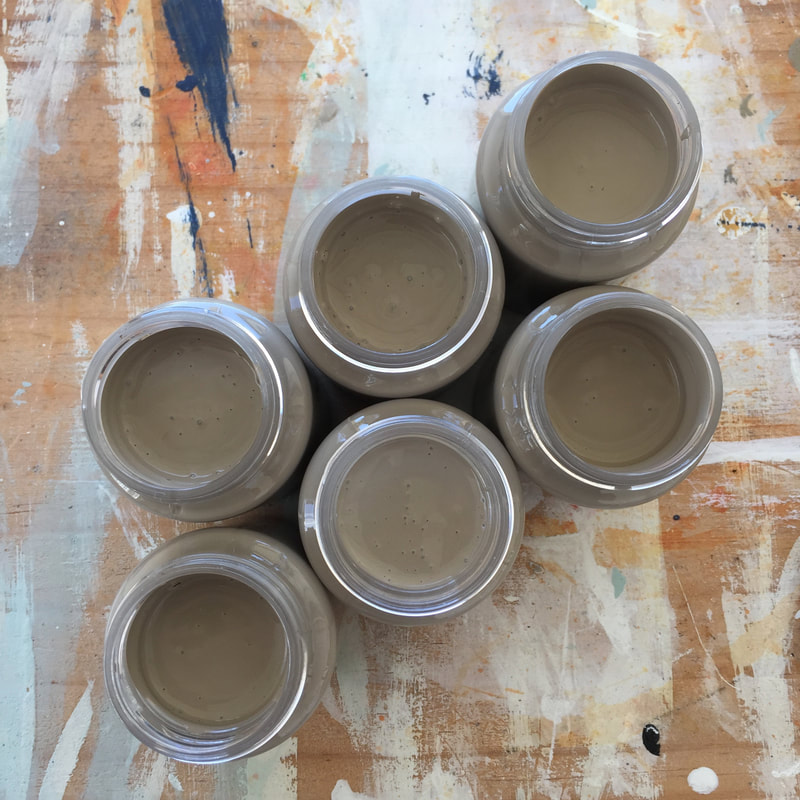
 It's been a while since we added colours to our range, so this Spring we will be adding several. From left to right we now have Moss, Off White, Sage and Sand.
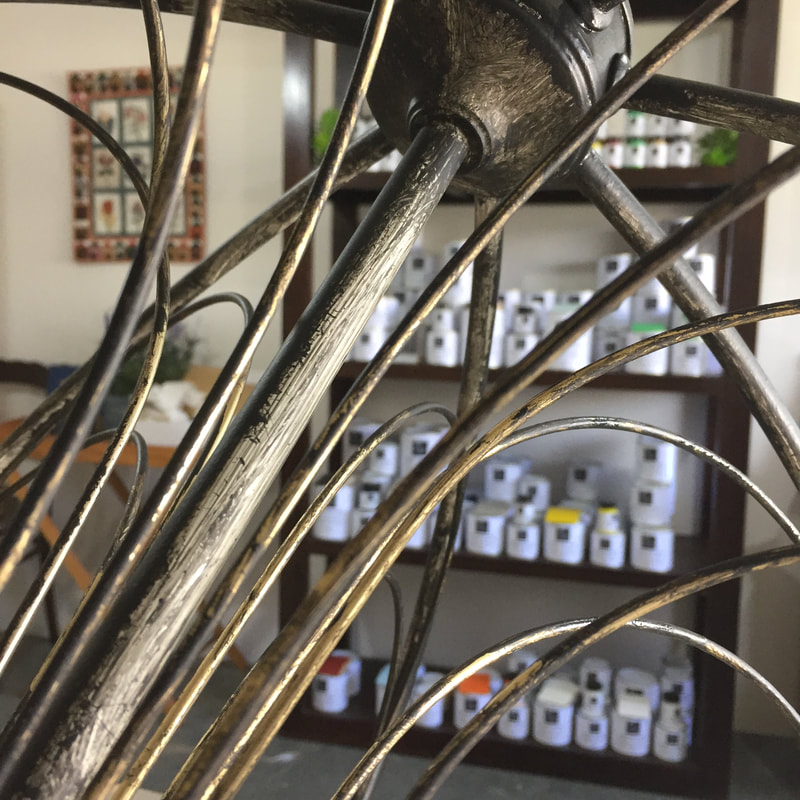
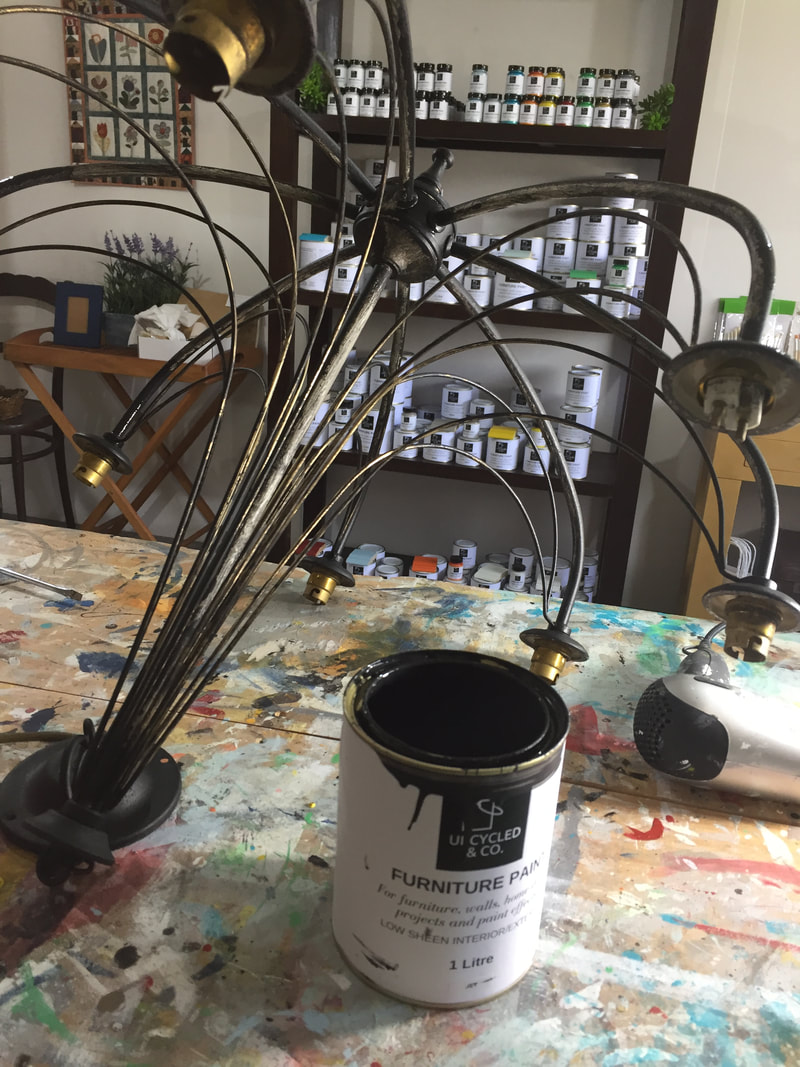
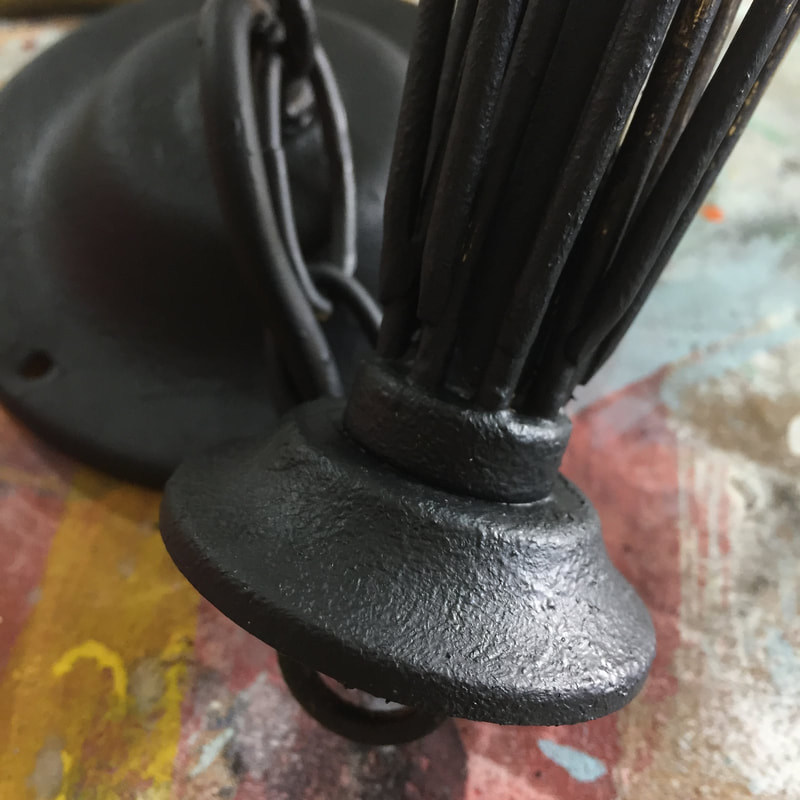
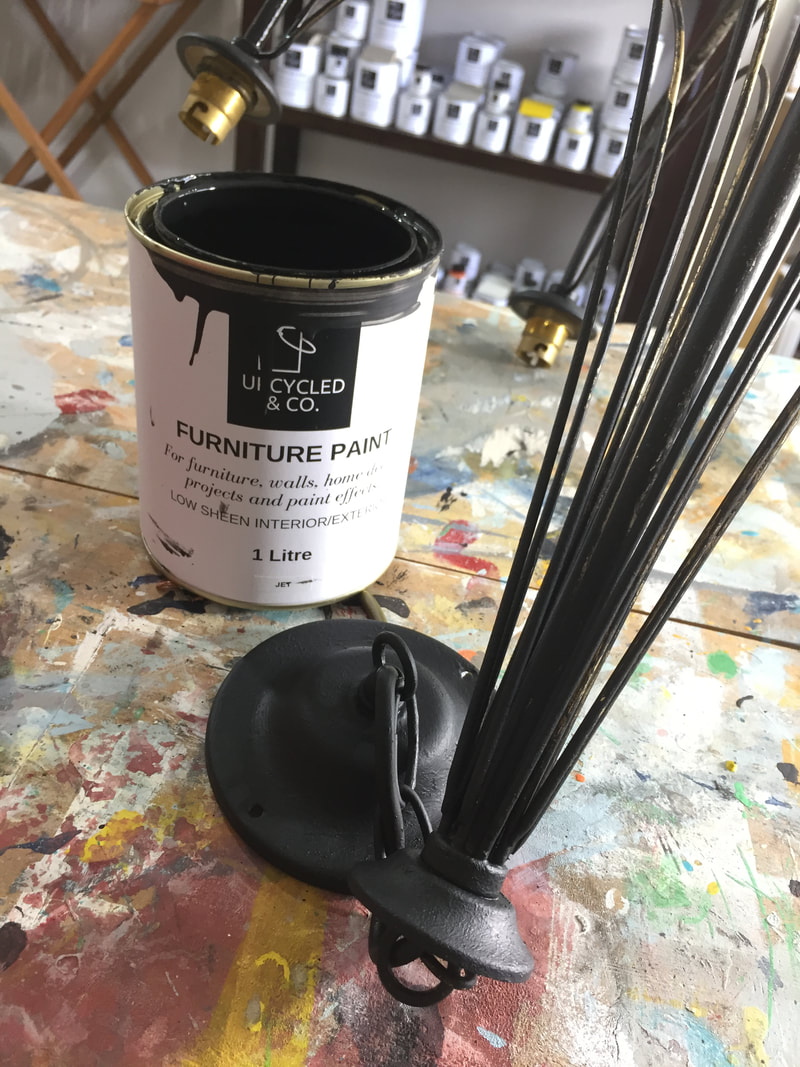
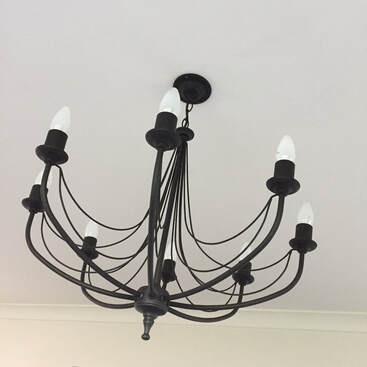 For quite some time I had wanted to change our dining room chandelier, but lights are expensive, and I was busy, so it just hadn't happened. It really was not one of my favourite things in our home. Enter the start up of Upcycled & Co., my furniture paint and furniture painting workshop business in 2016. About this time, everything started to get painted; and I mean everything! It was after I launched Upcycled & Co. Furniture Paint in April 2017 that I took things up a notch, with even more painting projects getting underway. With my paint being an indoor and outdoor paint, and one that easily paints onto pretty much any surface, I now had the answer for our ugly chandelier. I would paint in it Upcycled & Co. Furniture Paint in Jet, our gorgeous black. Okay, so here's what I did step-by-step: 1. Clean well with a degreaser (prepsol or other) to remove all dirt and grime. 2. Apply one very sparse coat using the tiniest amount of paint and spreading it all over. You should still be able to see through this coat easily, and if you have the right amount of paint, it will dry as you are doing it. This gives the next coat something to stick to. 3. Apply your second coat (and third if necessary) as normal. Depending on what colour paint you are using, and what colour you are painting onto, will determine how many coats you need. For example - if you're painting white onto a dark surface you will need more coats, as with any paint. 4. Leave to dry and fully cure for 7 days (10 days in the winter months). You can also make a drying room in a spare room with a heater going to help with curing. 5. If you'd like extra shine (Upcycled & Co. Furniture Paint is a low sheen finish) or if you'd like added protection, you can add a clear coat. For this I used British Paints Spray Easy Satin Finish which is available at Bunnings. This was such a quick and easy project that only took a couple of hours. Using a texture finish (see picture bottom left above) made it easier to get in and around all of the small pieces that meet at the top of the chandelier. 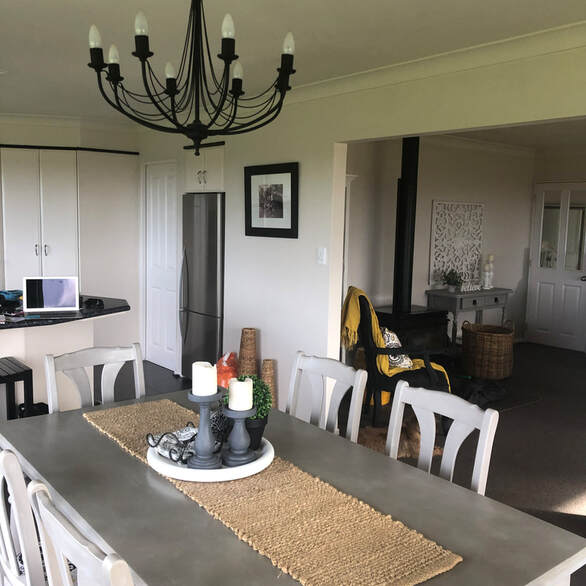
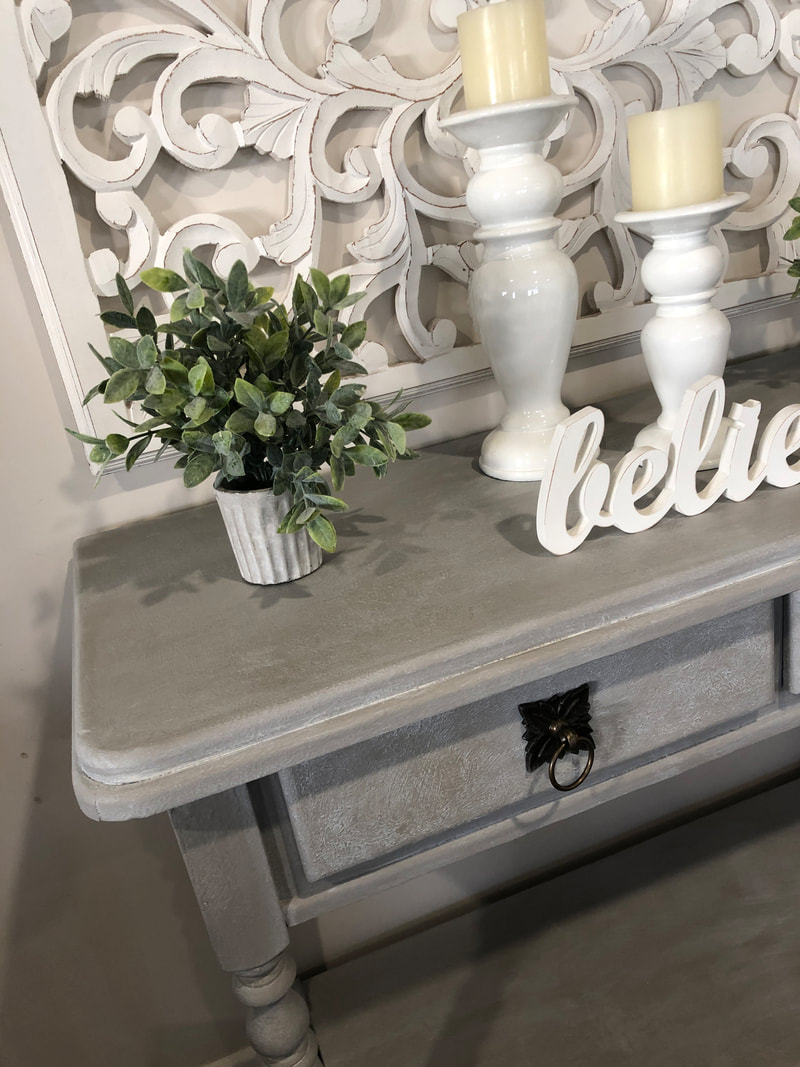
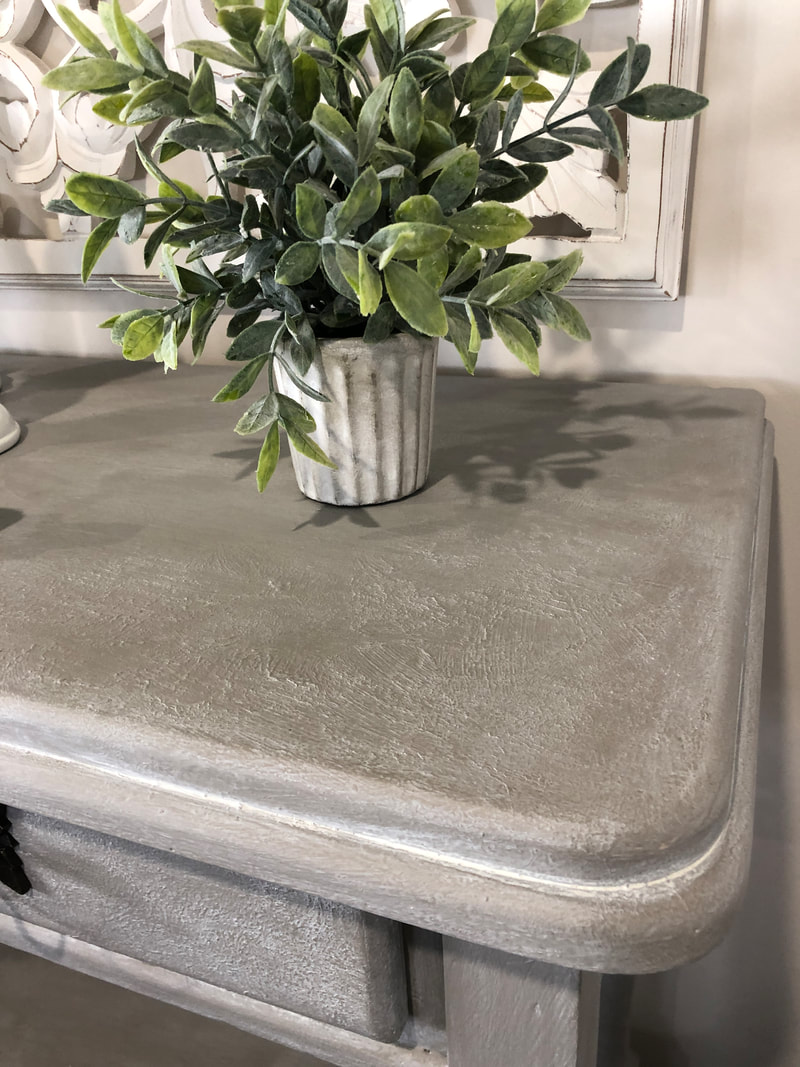
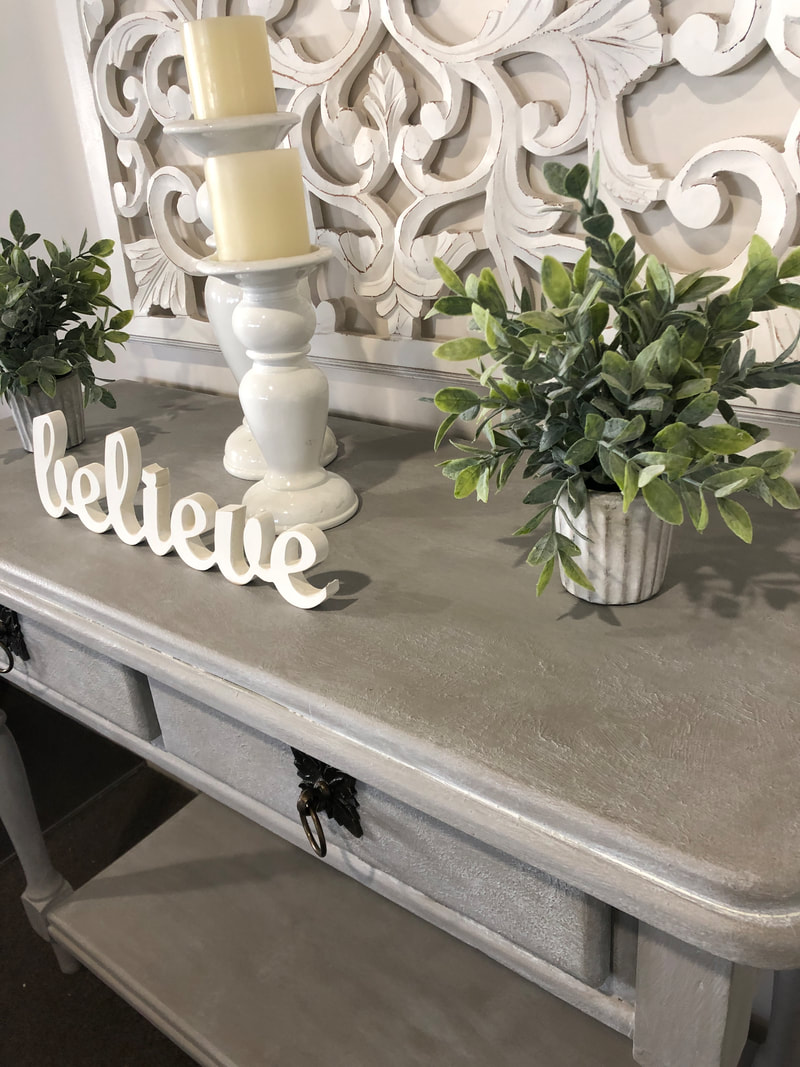
This is a simple and inexpensive pine side table I purchased on Trade Me a couple of years ago. When I first painted it I quite liked it but I wasn't over-the-moon. Then I decided to go over it with Upcycled & Co. Furniture Paint in White when I first started spray painting, and I didn't love that look either. On a wet and windy winter's Sunday afternoon I was browsing through Pinterest (as us creatives do) and I got all inspired. So, I decided to paint it the same colour as the table I have in our hallway and now I love it! Click the images to see a larger version and scroll through. Here's what I did: 1. Applied one thick coat of Upcycled & Co. Furniture Paint in Linen all over. 2. Created texture using the brush and a hairdryer (check out the video here). You can create even more texture by half drying the paint, then brushing in a back and forth motion. 3. Dry with a hairdryer. 4. Water down my Upcycled & Co. Furniture Paint in Vanilla using 50/50 water and paint. 5. Apply a washed effect over the entire piece (check out this video here). So, so QUICK, EASY + AFFORDABLE! And all done in just on 2 hours. Until next time, Kathryn x
When I launched Upcycled & Co. Furniture Paint in 2017 it was important to me that my product made furniture painting QUICK, EASY + AFFORDABLE! To my mind, there were far too many products out there that not everyone could afford (by the time you bought paint, wax and other finishes).
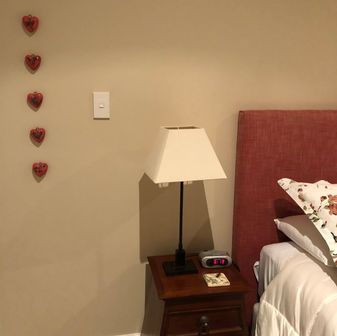
Upcycled & Co. Furniture Paint is a water-based paint that primes, paints and seals all at the same time making it affordable compared chalk paint. Our paint is not chalk paint and requires no wax or other sealer (it has its own sealer in the paint). Create all of your favourite waxed, aged, smooth, antique, distressed, white washed, rustic, vintage, textured or chalk paint looks quickly and easily USING ONLY PAINT. And, of course you can create your own colours. I only launched 15 colours because I wanted to encourage you to mix your own and this video shows you just how simple that is! Come on over and join our Facebook group, we've got more than 4,500 members who are always sharing projects and ideas. See you there, Kathryn x 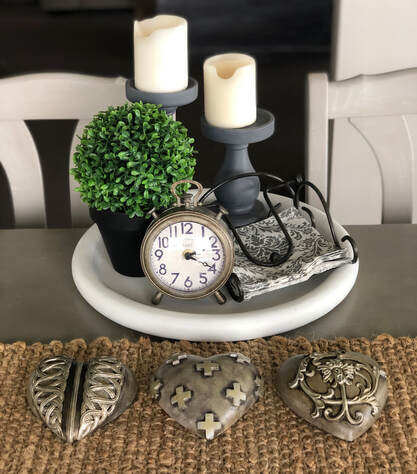 Some time ago I bought two of these hearts (the top one and the bottom one) in this photograph. I knew I wanted three to hang on our wall and I struggled to find one that matched well.
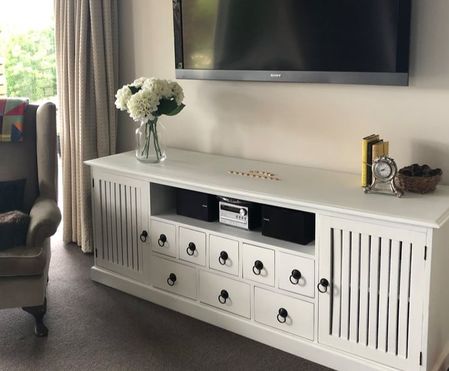
So, I did what I always do... I painted one to match the others. This was a fun wee project and only took an hour. If you're wanting to see exactly how I did it, check out my Facebook LIVE from this morning. Naturally, I used Upcycled & Co. Furniture Paint in a range of colours - Latte, Linen, Ash, Jet, Chocolate, Gold and Silver. With a base coat of Latte, the other colours were then layered over each other until I got the colour I was looking for. Next I highlighted the crosses with a mix of Jet and Chocolate to make them stand out, as the design on the top heart is. After this, the crosses were next and they were painted in a layering effect of Silver, Linen, Gold and Ash. Often when we are trying to match colours is can prove tricky, and once I had finished the heart with the crosses, the other two needed some colours adding so the three all tied in well together. What I always say to my workshop and tutorial students is this... We are all apprehensive when we are doing something new; face your fears and just do it. If it doesn't quite work out how you wanted it to, paint over it. Easy! You might be surprised to know that I was a little nervous doing this live this morning without any practice at all. Yes, I was. Yesterday I almost had a practice on a piece of paper, but I thought, if it doesn't work out, I'll just start over. Have fun painting and come on over and join our Facebook group where we've now got more than 5,000 members. Until next time, Kathryn x I always find it hugely inspiring to look at other people's projects. Don't you? Many of my followers on my Facebook page, and in my Facebook group find the same. So, I thought I'd put together this little video with projects that some of my customers have done this year using Upcycled & Co. Furniture Paint. If you're new to furniture painting and want to give it a go, I always recommend starting with one small piece - a chair, small table, stool, maybe a tray or whatever feels manageable for you. Tackling a larger project like a dining room suite for bedroom suite takes a good chunk of time and starting with something small will give you the confidence you need to tackle the bigger pieces. Come on over and join our Facebook page here for more ideas and inspiration. Bye for now, Kathryn x Looking at what others do with their furniture is something I always find inspiring. If you'd like to see more projects (all the time!), come and join my Facebook group, the Upcycled & Co. Community. I just love to see my customers' projects; here are a just a few from the many!
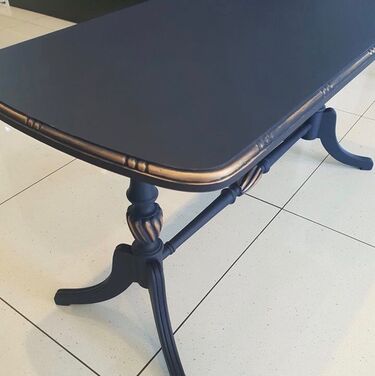
Anne used a custom colour mix of Upcycled & Co. Furniture Paint of two parts Aqua to one part Navy for this stunning upcycle. She then applied a semi-gloss water-based polyurethane to give it a higher shine.
Emma create this gorgeous table using Upcycled & Co. Furniture Paint in Navy with a touch of Gold to highlight its features.
Melanie painted this dressing table in Upcycled & Co. Furniture Paint in White and changed the handles.
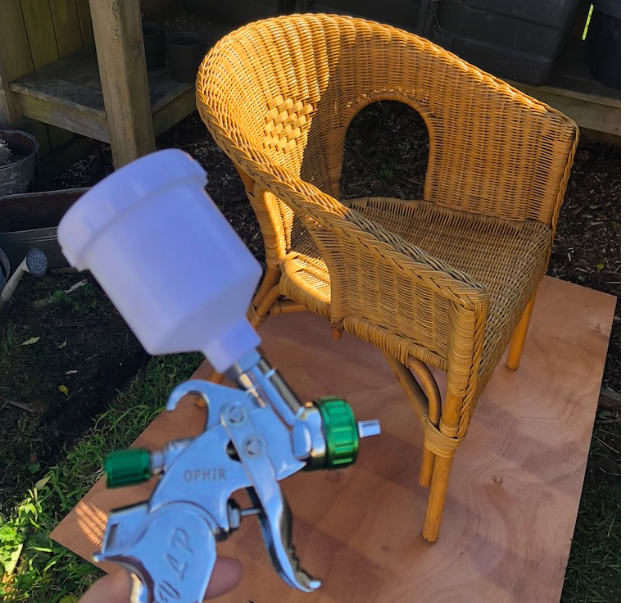
This cute wee table was painted by Emma in Upcycled & Co. Furniture Paint in Jet. She added anaglypta wallpaper to the front to give the texture, then highlighted those parts using metallic paint. So, if you're sitting on the fence when it comes to painting your furniture, why not give it a go with one small piece? For more information about Upcycled & Co. Furniture Paint, click here. See you over in my Facebook group! By for now, Kathryn x This really is the quickest and easiest way to apply Upcycled & Co. Furniture Paint to anything. The old teak chest pictured below has been around for more than 20 years so I decided it needed a bit of a spruce up. Literally, this took 3 teaspoons of paint and 30 minutes to do - it's that easy! Here's what I did: 1. Gave the chest a good clean with warm soapy water. 2. Clean with a wet rag. 3. Watered the paint down 50/50 (it doesn't have to be exact). 4. Working section by section - paint one side. 5. Quickly remove the excess with a rag (it's easier to have a pile of small rags than one big one). 6. Leave to dry and cure for 7 days. This 30 year old teak chest from Early Settler is painted using Upcycled & Co. Furniture Paint in White in this technique.  It's so super-easy and quick! You can get my FREE video tutorial on how to do this HERE! Happy painting! Kathryn x This week I have been learning to spray paint... and oh boy what fun it is. I'm lucky enough to have a brother who has been a car and custom painter for more than 40 years, so there's no doubt about it, I'm learning from an expert. With a cute little spray gun (well, I think it's cute) he gave me, I have a wee play last weekend and painted our cane furniture to use outdoors over summer. I was so amazed at the speed and ease of painting with a spray gun that I kept saying over and over, "This is amazing! This is so quick. I love it!" I just couldn't believe it. And of course it gives such a beautiful finish too. Now I've been thinking about some of the comments I have had on social media like, "I'm jealous!" and "Is it difficult?", and it got me thinking. I really want to stress just how easy, and relatively inexpensive it is to get yourself set up to spray paint. Here's what I have and what they cost: - Small HVLP gravity feed (1.0mm) spray gun (this was a gift from my brother but there are loads on Trade Me) which is good for small items. - A larger gun (1.4mm) is ideal for larger surfaces, e.g. table tops and the like $120. This can be used on smaller pieces too. - Ryobi Compressor $249 from Bunnings. - Gazebo $100 (to use as a spray booth) from Trade Me. This one is blue and in hindsight, a white one would have been better, but it's fine. You will need to water the paint down by around 10-20%. Start with 10% and see how it goes, then add more water if you need to. Depending on how long your paint has been sitting, it may be quite thick and need more water. If you think about the cost of the paint and the equipment, then compare it to buying a new house lot of furniture, there's no argument really. You could always go halves with a friend or family member too. So far I've done a couple of small projects, but I have loads more to do.
If you've been wanting to try spray painting, give it a go!
Watch this space, I may yet do a Spray Painting Workshop. Kathryn x
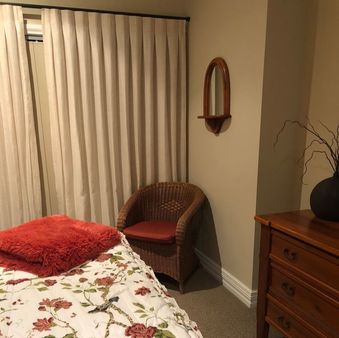
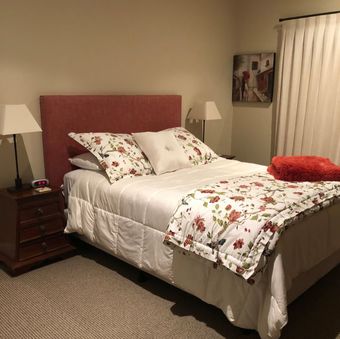
You know how I love to visit inspiring spaces... and share them with you... Well, a few weeks ago I was in the Hawkes' Bay to run my Furniture Paint 101 workshop and I stayed in this gorgeous bed and breakfast. It was such an inspiring space I wanted to show you my photographs. Tucked away underneath the main house and North facing, the bedrooms looked out onto the beautifully manicured garden. I just loved how the space was cohesive and came together with different textures and layers that complemented each other perfectly.
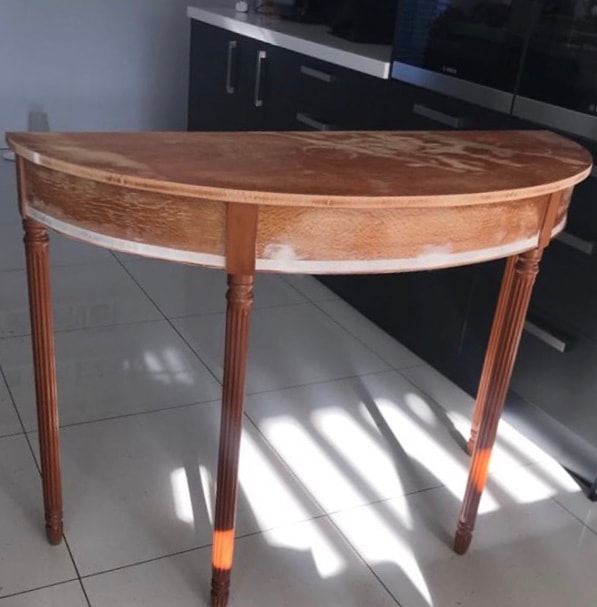
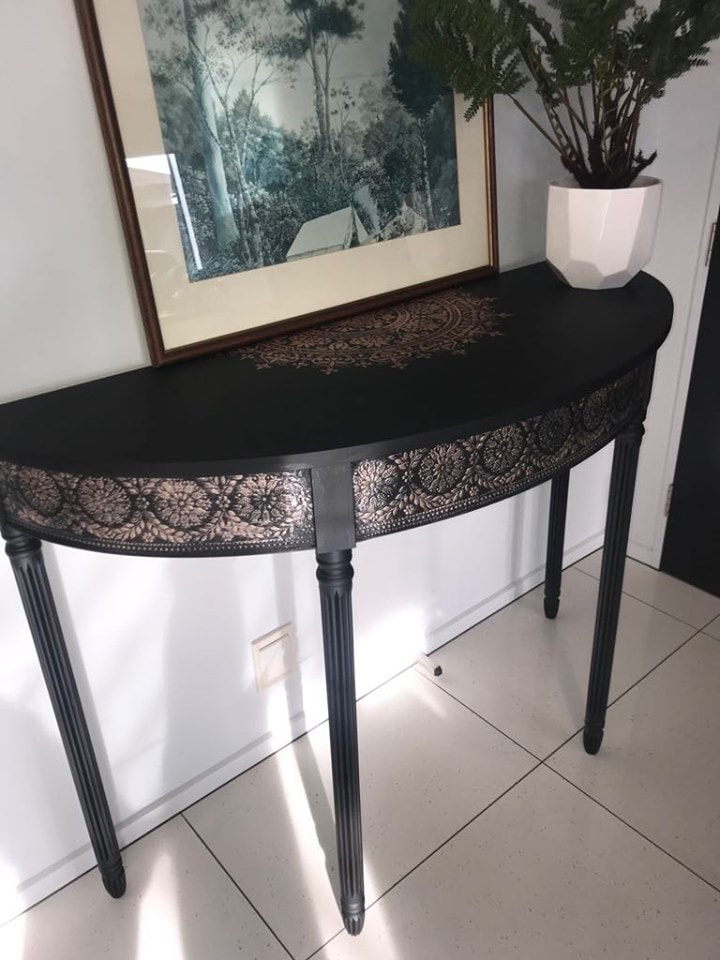
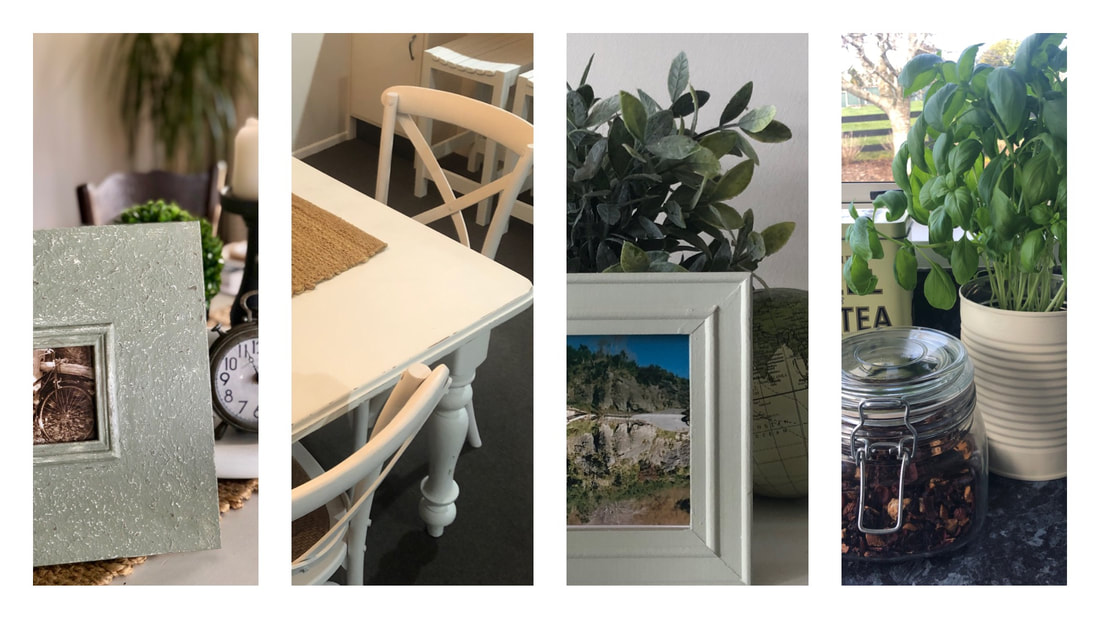
Each room in this two bedroom apartment was beautifully decorated, and the bed linen was luxurious. It's the perfect space for a weekend getaway for up to four people. Number 4 Behind the Gate is just a 3 minute drive to Havelock North. Looking for furniture painting inspiration? Check out my before and after gallery HERE. Until next time, Kathryn x Yes, you can even paint metal with Upcycled & Co. Furniture Paint! Some of the metal pieces I have painted include our dining room chandelier, light fittings and embossed brass-look metal wall plaques and they've all come up beautifully. You can also do vases, garden planters, chairs, tables and the list goes on... Recently I put together this tutorial when I painted the new light fittings for our bedroom wall. Like all projects using Upcycled & Co. Furniture Paint... It's QUICK and EASY! For those of you have attended one of my workshops you will have seen the photo frame I use for my price list. So many people ask me how I did it, so I thought it was the perfect thing to do a Facebook LIVE on. The frame is one I purchased from a Dollar Store, and it was just $6. Here's a sneak peak of the finished frame.  And... here's the video tutorial... This is such an easy process, and can be completed in 30 minutes easily. Have fun! Happy painting, Kathryn x A rough and rustic look is my favourite which ever way it is prepared. This particular one is super-easy to achieve and there really is no right or wrong way - it just turns out how it turns out. Easy! For this project I chose a side table I picked up locally for $60 so it was a real bargain, and the perfect piece for this technique. In this blog post I'm going to take you through the steps I took to get the look. Of course I've used Upcycled & Co. Furniture Paint. It's a 3-in-1 furniture paint that primes, paints and seals meaning you do not need wax or varnish to finish your piece. This makes the process quicker and easier, and the best part, it makes it more affordable. In April 2017 I launched Upcycled & Co. Furniture Paint after noticing that it was quite expensive to use a chalk type paint by the time I had bought the paint and the coloured and clear waxes. I wanted to create a product that was more accessible for people due to the cost. Around six months before my launch I set about experimenting with paints and finishes; I wanted to create the same waxed looks, but just using paint and I knew there had to be a way. So, me being me, I found the way. I then spoke with paint manufacturers and found one who could provide what I needed, and as they say, the rest is history. Designed to work with my Furniture Painting Workshop processes and techniques, Upcycled & Co. Furniture Paint is hardwearing, and it's indoor and outdoor. 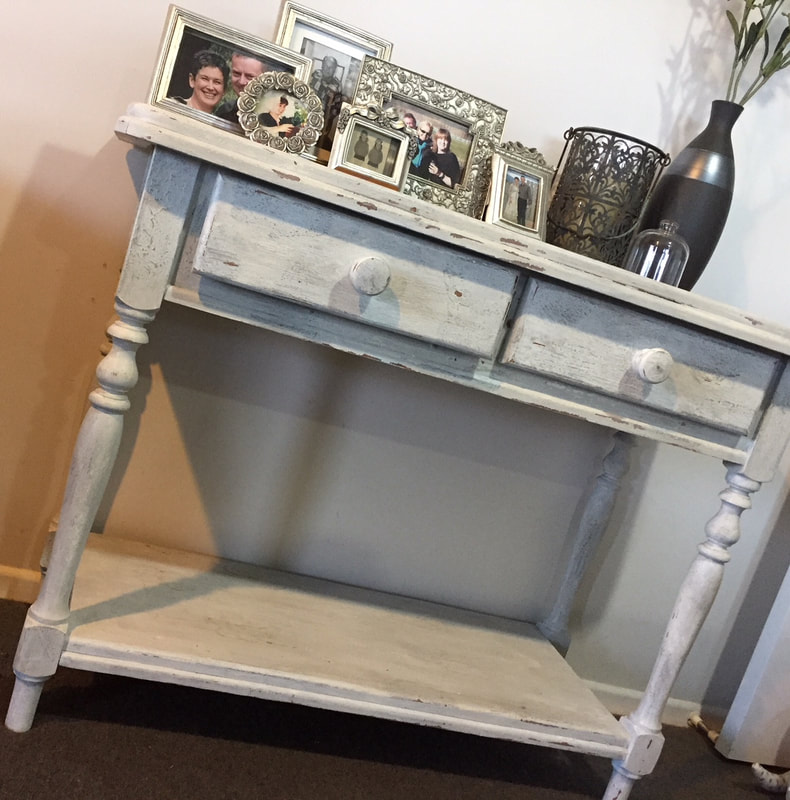 Here's how I got the look: STEP 1 Clean your piece well with warm soapy water. Use sugar soap if you have built up grime or dust. Remove any wax or furniture polish with rubbing alcohol, methylated spirits or mineral turpentine until it is gone. STEP 2 Choose three colours (or two or more if you wish). For this table I have used Upcycled & Co. Furniture Paint in White, Linen and Ash. 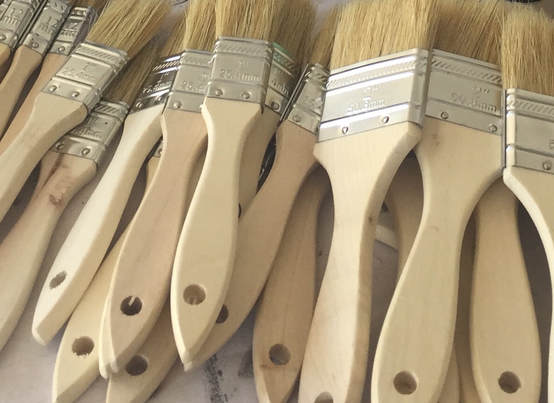 For this type of project, I use a chip brush. These come in a range of sizes and for this particular job I used the 75mm one which means you can cover a bigger area making it much quicker. 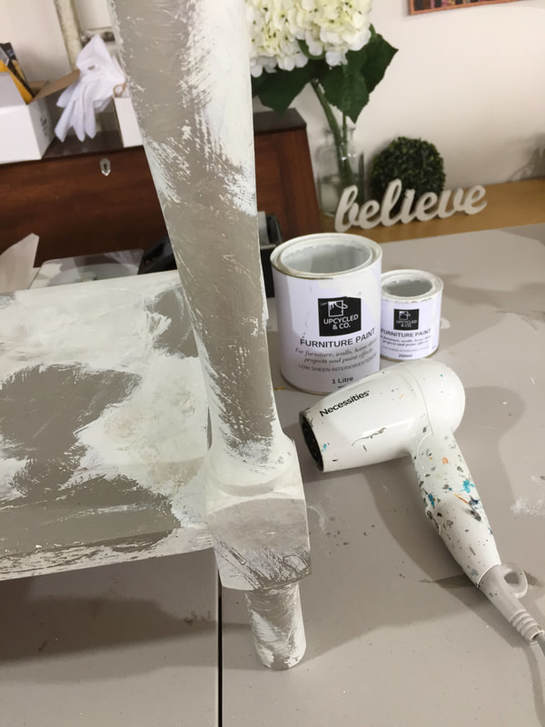 STEP 3 Paint your piece all over, in all directions, with your base colour (I used White). This is the colour you will see a small amount of once you're project is finished. Because we are wanting lots of texture, it is important that you paint any which way, and use your brush to stipple as well (a stabbing motion with the tip of your brush on your painted surface). As you apply the paint, half dry it with a hairdryer, then drag your brush back and forth to create texture. IMPORTANT: The thicker your paint (e.g. the more paint you use) the more texture you will get. STEP 4 With your second colour (I used Linen and this one you will see a small amount of too, but it will blend with the other colours once your piece is completed), again paint in all directions, but this time, paint thick patches on your piece, randomly selecting areas to paint. Once you've got your patches on, again, half dry them with a hairdryer, then drag your brush over them to create more texture. STEP 5 Once you have both of your bottom coats on, give your piece a good dry off, either with a hairdryer or leave your piece a few hours in the sun or overnight in a warm room. STEP 6 With your third colour (I used Ash) water your paint down slightly, then paint one coat over the whole piece, this time paint back and forth as you normally would. It doesn't matter if your piece is not completely covered (you may still see some bit underneath). Allow time for this coat to dry as above. STEP 7 Using a sanding block and/or small pieces of 240grit sandpaper, rub the piece back to bring the underneath colours through. Again, this is random and you can do as much or as little as you like. Make sure you wipe away any dust using an old paint brush. STEP 8 Wipe your piece over with a wet rag to remove all sanding dust. You may need to wipe it a couple of times. 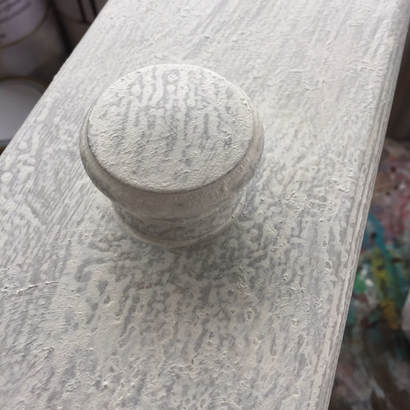 STEP 9 Now choose one of your colours (I used White) for your final coat. Water this paint down about 50/50 then brush it all over your piece (as in the picture above). This coat will dry quite quickly. 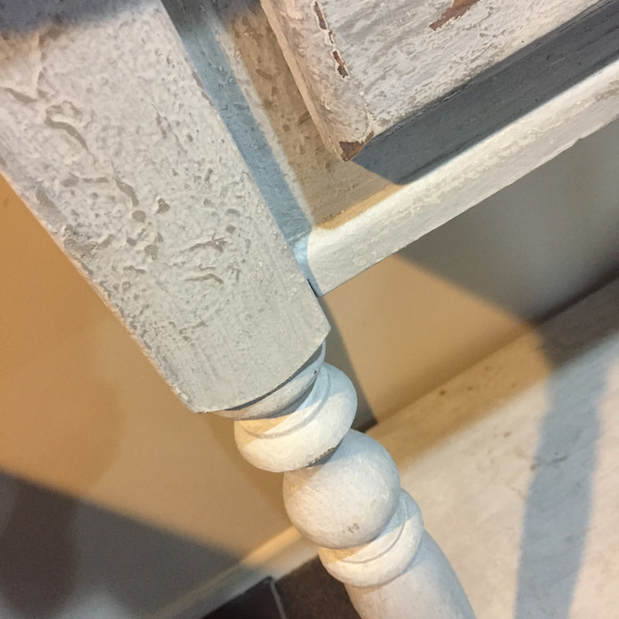 STEP 10 Once your piece is dry, distress the edges using 240 grit sandpaper to reveal the colours (and some of the wood) underneath.  The great thing about this technique (and all furniture painting process for that matter) is that you're goal is to create something unique for your home. To my mind, furniture painting is not about creating something perfect that looks like it has come out of a factory, it's about having fun and enjoying the creative process. And if you don't like it when you're done... simply paint over it! Find out more about Upcycled & Co. Furniture Paint and my furniture painting workshops. Happy painting! Kathryn x |
Author
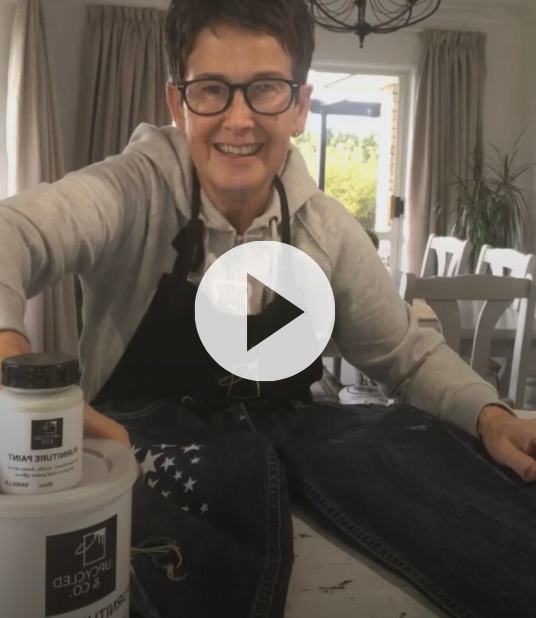
Hi I'm Kathryn,
You're going to love how QUICK, EASY + AFFORDABLE it is to transform your furniture. With Upcycled & Co. Furniture Paint, a 3-in-1 that primes, paints and seals (it's not chalk paint) you won't need to sand, prime, wax or seal - just paint and you're done. I'm super-passionate about sharing what I know about furniture painting to make it easy for you. If you'd love to start a creative business I can help with that too, simply click here. Enjoy! 
|